Precision SL Simple user maintenance guide
Desiccant capsule replacement
When to replace? Silica gel will darken as it becomes saturated.Depending on usage a 12 week minimum lifetime is expected.
When to replace? Silica gel will darken as it becomes saturated.Depending on usage a 12 week minimum lifetime is expected.
Follow the step by step instructions below to replace your desiccant capsule replacement
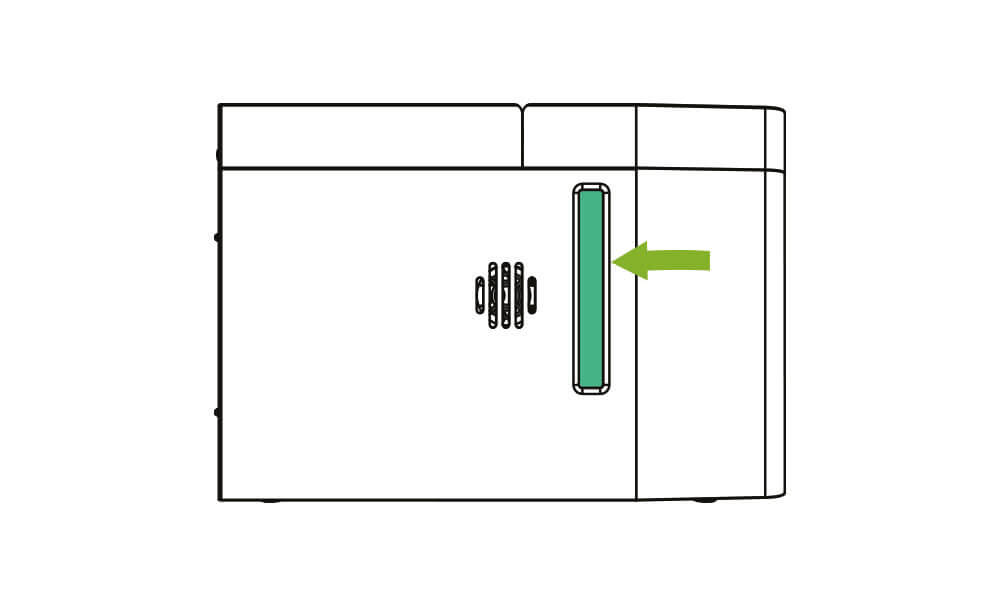 Step 1: Check Silica gel colour via the window on the left-hand side panel of the generator (if blue/green it needs to be replaced). Step 1: Check Silica gel colour via the window on the left-hand side panel of the generator (if blue/green it needs to be replaced). |
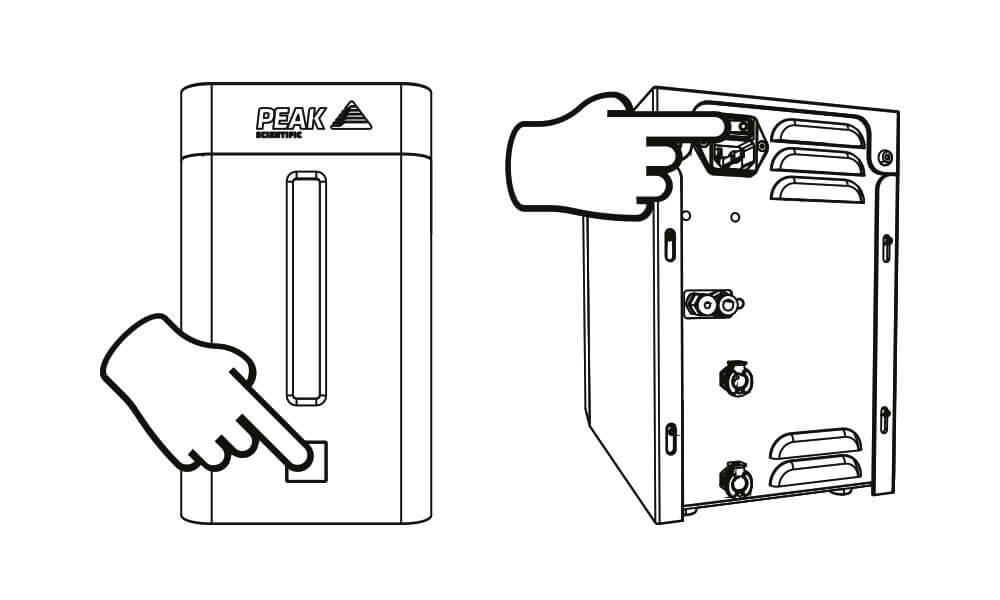 Step 2: Press and hold the power button for 5 seconds to shutdown and depressurize. Now turn off the main power switch at the back of the unit. Step 2: Press and hold the power button for 5 seconds to shutdown and depressurize. Now turn off the main power switch at the back of the unit. |
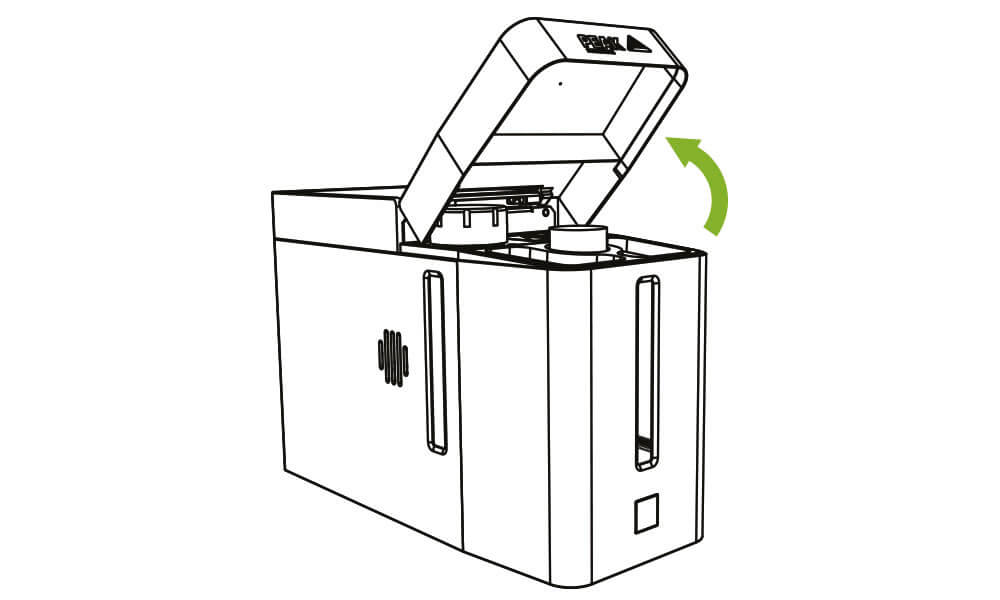 Step 3: Open the top panel by lifting gently. Step 3: Open the top panel by lifting gently. |
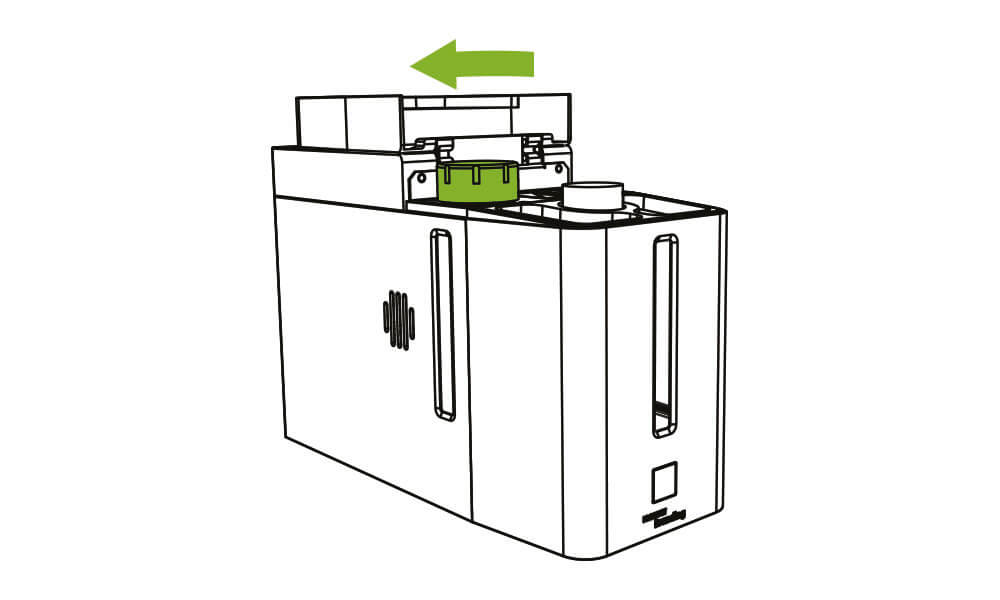 >Step 4: Loosen and remove the cap of the desiccant dryer by placing the tool onto the cap and turning counter-clockwise. >Step 4: Loosen and remove the cap of the desiccant dryer by placing the tool onto the cap and turning counter-clockwise. |
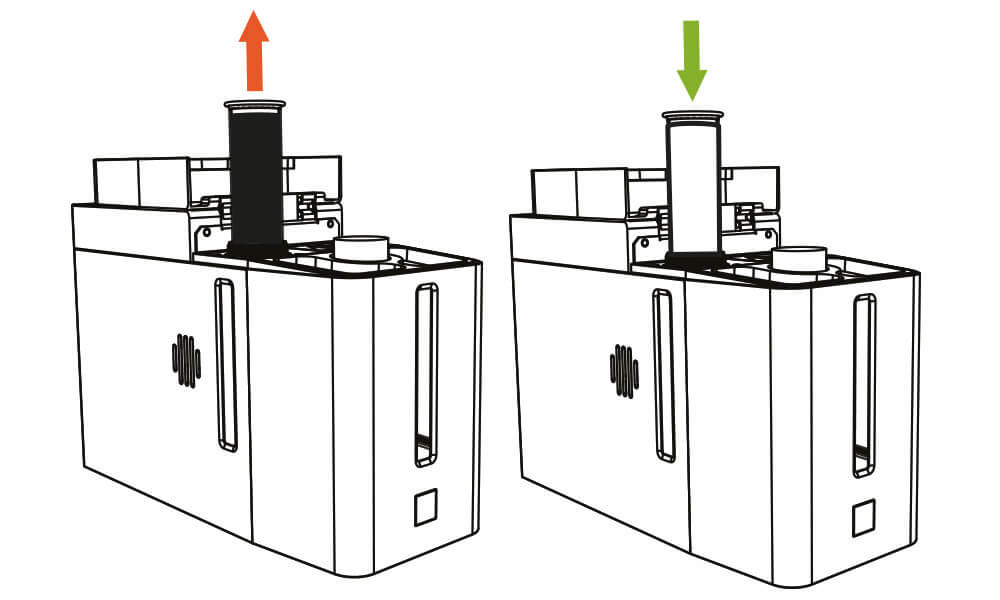 Step 5: Remove the saturated desiccant capsule and replace with a fresh capsule. Step 5: Remove the saturated desiccant capsule and replace with a fresh capsule. |
 Step 6: Replace the cap and place the tool on top, tighten with the tool by turning it clockwise. Step 6: Replace the cap and place the tool on top, tighten with the tool by turning it clockwise. |
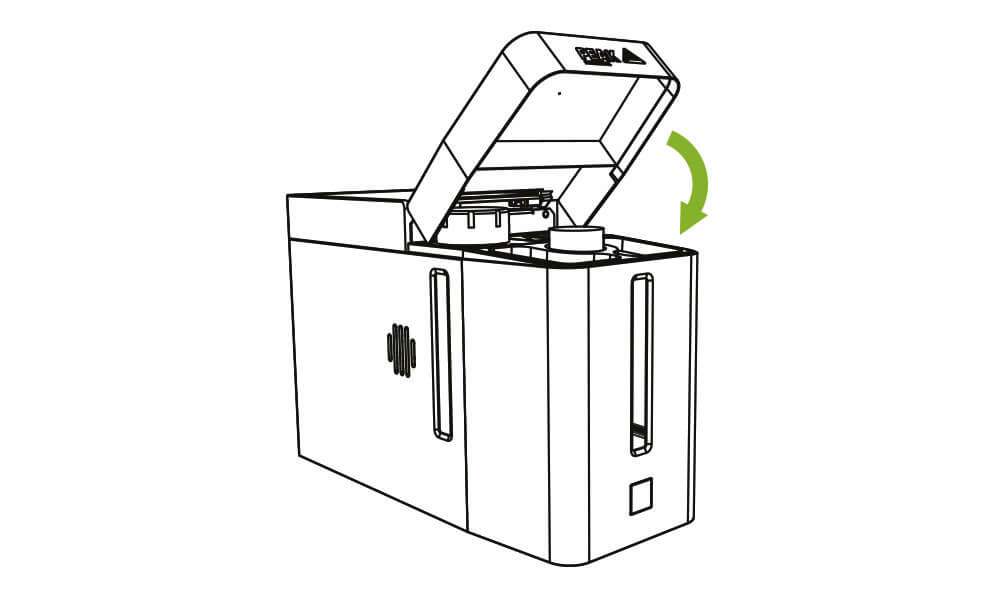 Step 7: Close the top panel. |
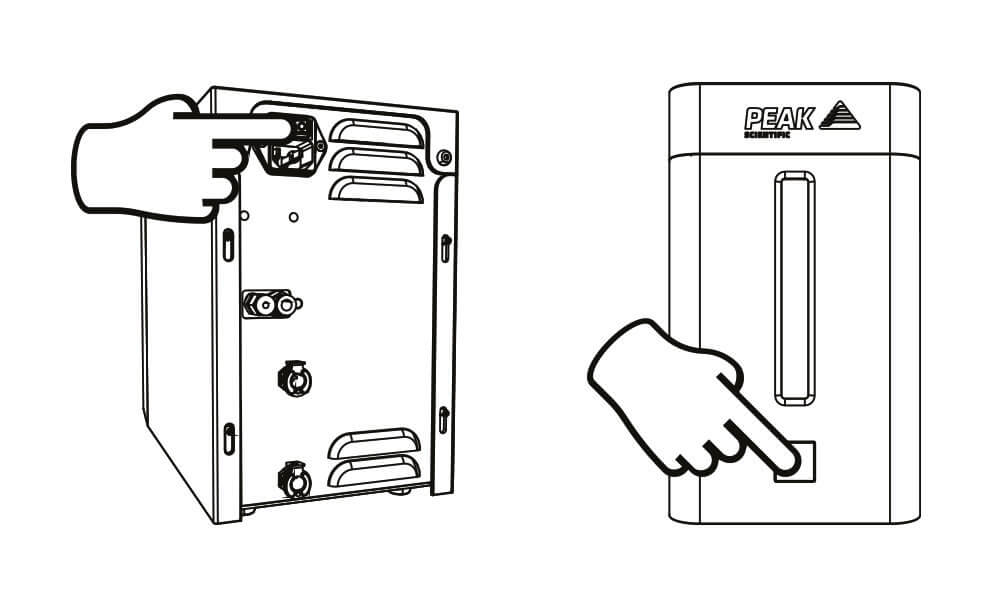 Step 8: Power up the generator using the main power switch on the rear of the unit. Once diagnostics are complete, the LEDs will be solid green and the generator will be ready to deliver gas to the application. Press the front button to supply gas to the application. |
|
When to replace? Every 12 months from original installation.
Follow the step by step instructions below to replace your de-ionizer cartridge replacement
 Step 1: Press and hold the power button for 5 seconds to shutdown and depressurize. Now turn off the main power switch at the back of the unit Step 1: Press and hold the power button for 5 seconds to shutdown and depressurize. Now turn off the main power switch at the back of the unit |
 Step 2: Open the top panel by lifting gently. Step 2: Open the top panel by lifting gently. |
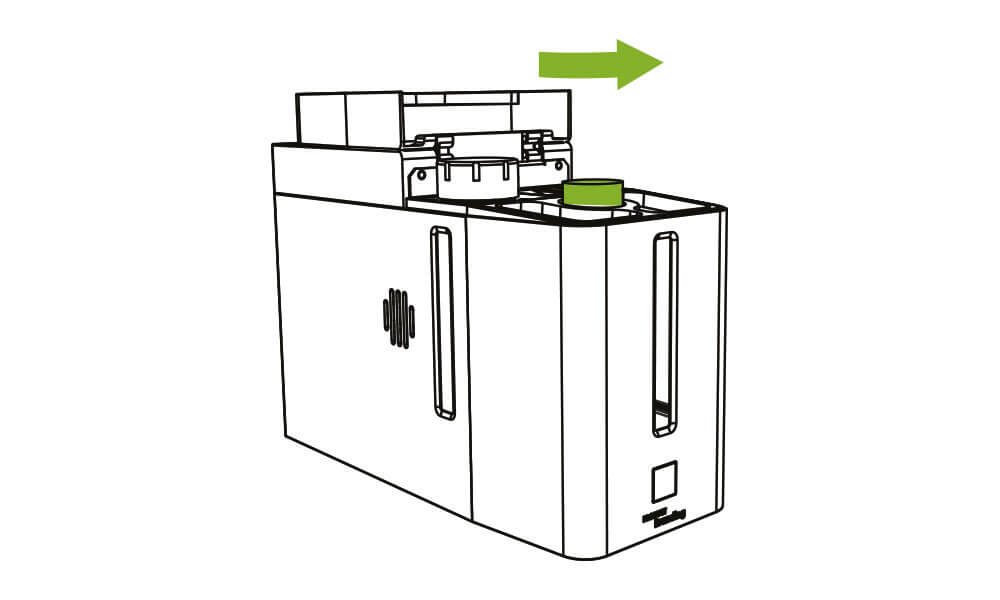 Step 3: The de-ionizer cartridge is located in the water tank and can be accessed by opening the top panel. Step 3: The de-ionizer cartridge is located in the water tank and can be accessed by opening the top panel. |
 Step 4: The de-ionizer cartridge can be removed by turning the cartridge counter-clockwise. Step 4: The de-ionizer cartridge can be removed by turning the cartridge counter-clockwise. |
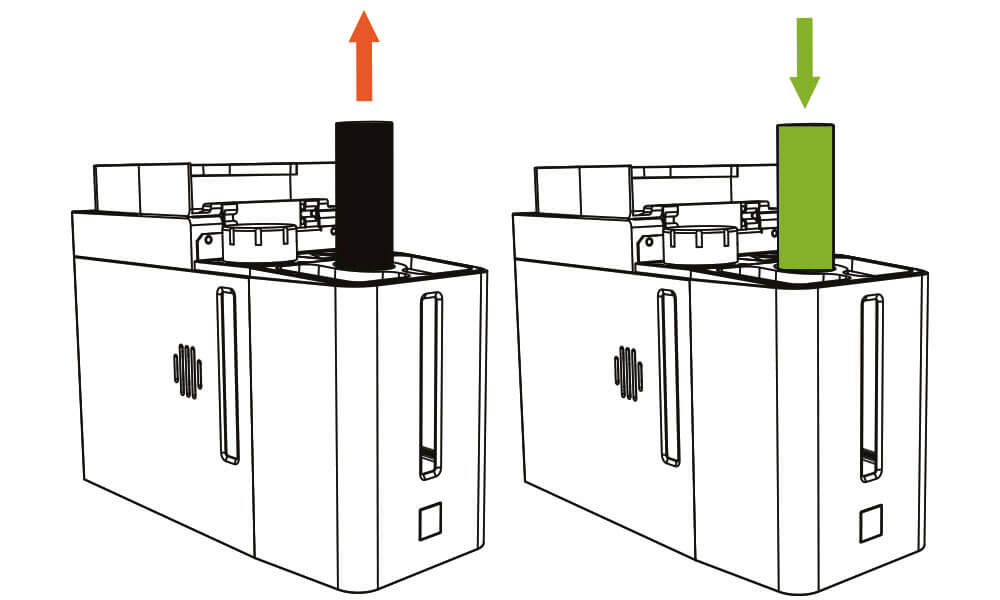 Step 5: Remove the de-ionizer cartridge and replace with a fresh cartridge. Step 5: Remove the de-ionizer cartridge and replace with a fresh cartridge. |
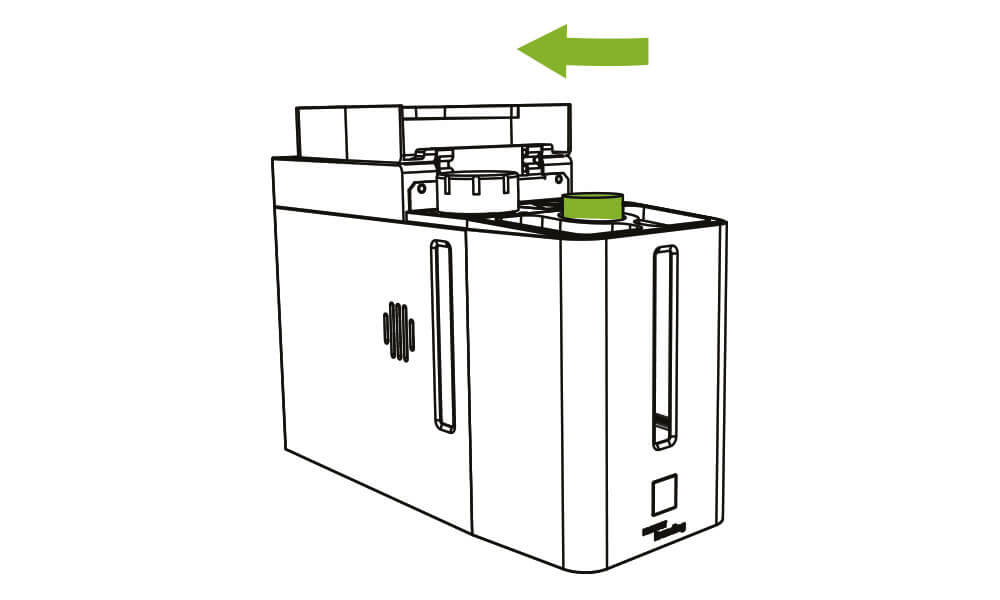 Step 6: Fix replacement de-ionizer cartridge in place by turning clockwise. Step 6: Fix replacement de-ionizer cartridge in place by turning clockwise. |
 Step 7: Close the top panel. The de-ionizer cartridge will need to be changed after 12 months. |
 Step 8: Power up the generator using the main power switch on the rear of the unit. Once diagnostics are complete, the LEDs will be solid green and the generator will be ready to deliver gas to the application. Press the front button to supply gas to the application. |
|